Recycling an Old Friend

This post first appeared on Patreon.

There’s a triple-point energy to working on something out at the edge of your abilities. Enumerated alongside the possibilities for failure are visions of the finished piece, installed and gloriously humming along, that make the long nights ahead less intimidating.

In late October of 2018, I began the CAD for such a project. Telapush had just closed our largest deal to date. We were to contracted to build a massive illuminated sign that would map social media interactions to custom animations to be displayed in real time. The piece was to run, un-attended for the entire month of December in the Center Court of the Prudential Center mall, inside of Boston’s most distinctive skyscraper.

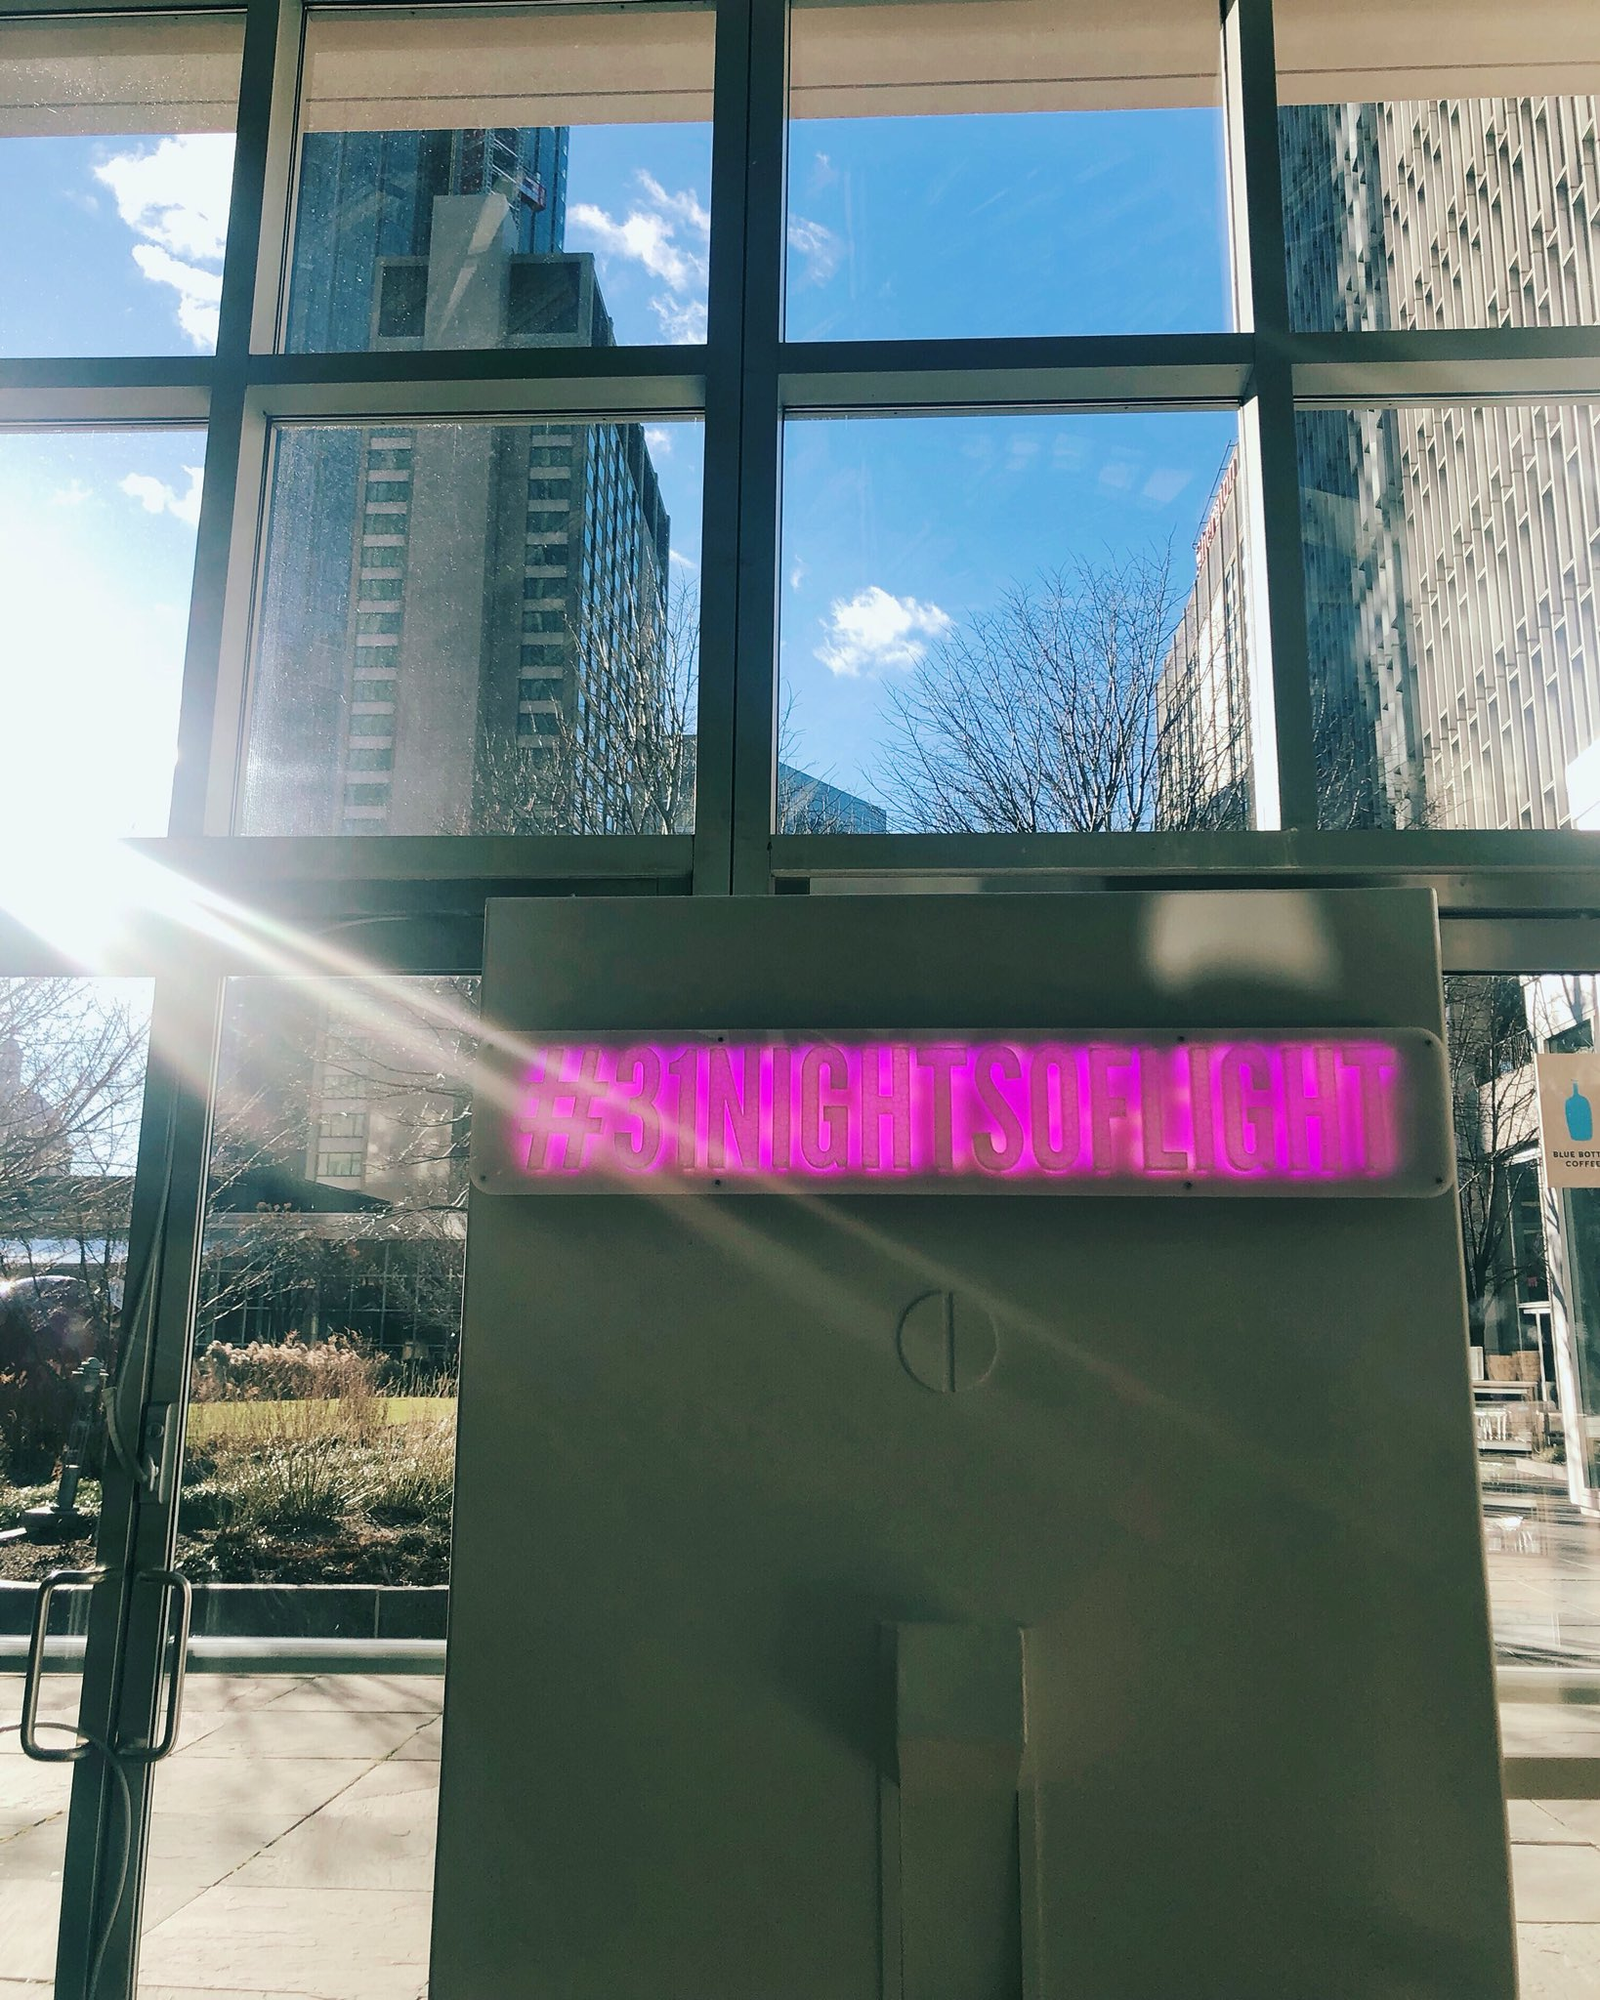
Erin and I had been pouring effort into Telapush for some time, and this installation was to be the largest tangible result from that effort. Serious people spending real money and expecting actual results. Boston was my new home and I felt that this project was my chance to make a good first impression to this new and intimidating place. This heightened importance, paired with the reverence for the challenge, coaxed out some good engineering; the project was a rousing success. More details about this installation can be found in my portfolio entry on the project.

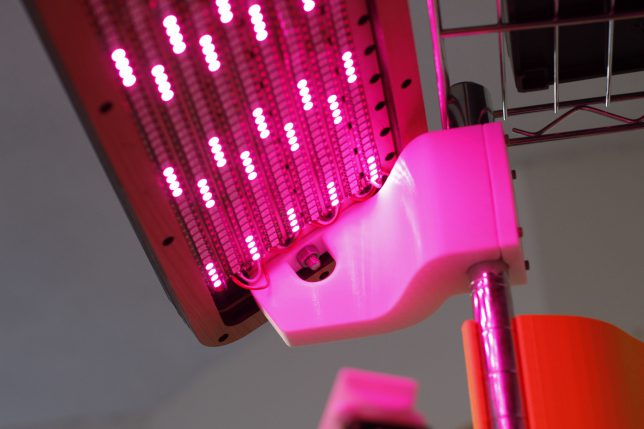
Luckily, one element of the installation that I was able to retain possession of after the installation concluded was the LED matrix. An overwhelming array of 1215 addressable LEDs, and a 100W power supply to drive them.

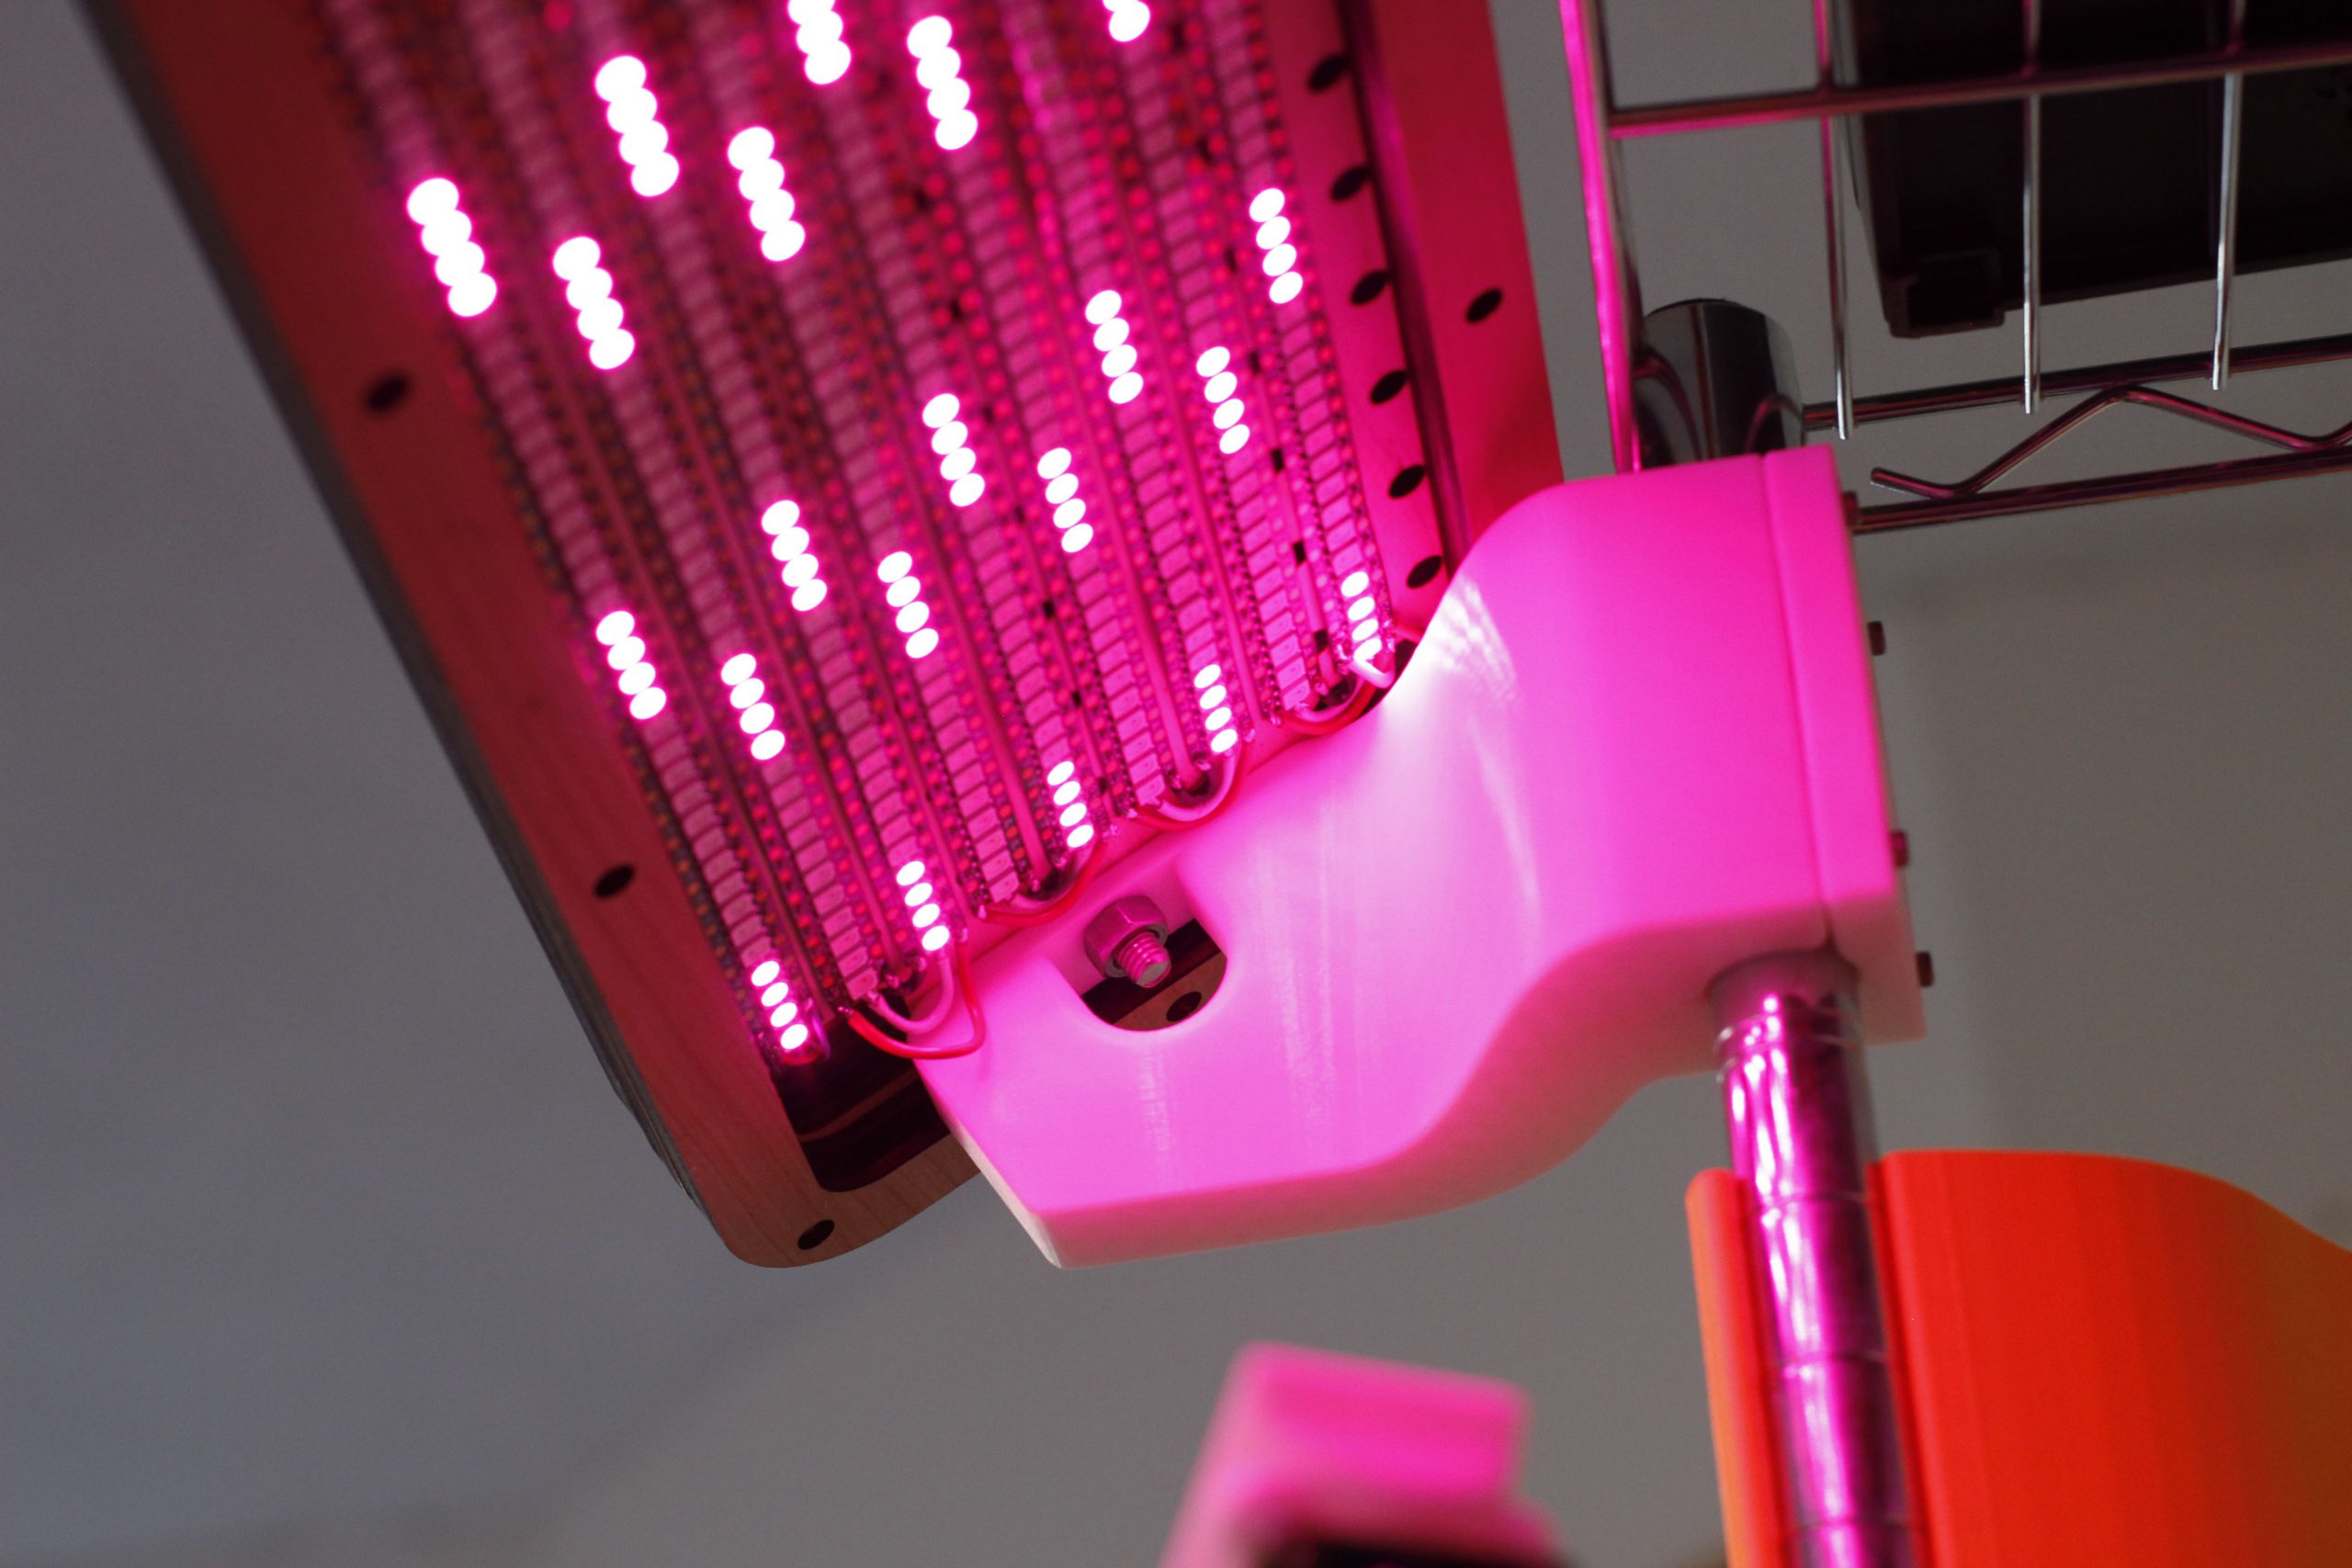
Still brimming with usefulness, and valuable as a totem commemorating the successful project, the light bar was filed into storage. Unfortunately, I lacked the bandwidth and inspiration to pick it back up. In the past few months however, on quiet nights, I could hear it calling out to me from the crawlspace, pleading to be reanimated. And after a few years of rest, this post describes how this favorite project is given a new lease on life to enhance my 3D printing workflow.

Continue reading →

The Silent Dripper

The first revision of this project was shipped in November of 2020, but the subsequent redesign was commissioned and completed the following summer in 2021. This post primarily a journey through that second revision, and it’s publication comes some time after the deliverable was shipped to the client.

Engineering requirements that arrive downstream from artistic intent are my favorite constraints to work inside of. It forces the engineer to assume the role of the artist, considering the feelings and ideas that will be communicated to the audience with the piece. The engineer also has to become an audience member to understand other factors about how viewing will take place, if the environment will change such that the piece needs to respond in kind. The space in between these to roles needs to be projected into the standard space of product requirements, weights, tolerances, latencies etc. that are common in the profession.

As a part of my freelance practice, interdisciplinary artist Sara Dittrich and I recently collaborated on a series of projects, adding to our shared body of work. The most technically challenging part of these most recent works was a component of her piece called The Tender Interval. I urge you to go read her documentation on this project, there is a great video overview as well.

Two performers sit at a table across from each other, above them is an IV stand with two containers full of water. Embedded in the table are two fingerprint sensors, one for each of the people seated at the table. Performers place their hands on the table, with their index fingers covering the sensors. Each time their heart beats, their container emits a single drop of water, which falls from above them into a glass placed next to them on the table. Once their glass fills, they drink the water. Optionally, virtual viewers on twitch can take the place of the second performer by sending commands on twitch that deposit water droplets into the second glass.

Design and manufacture of table and this insert were completed by Sara Dittrich

The device responsible for creating the water droplets (the dripper) ended up being a very technically demanding object to create. The preeminent cause of this difficulty was the requirement that it operate in complete silence. Since the first showings of this piece were done virtually due to the pandemic, we were able to punt this problem and get the around noisy operating levels of V1 using strategic microphone placement. However, this piece would eventually be shown in a gallery setting, which would require totally silent operation.

The following is a feature overview and demonstration of the completed silent dripper:

If you’re interested in building one of these to add to your own projects, there is a github organization that contains the:

Per usual, please send along photos of rebuilds of this project. Submit PRs if you have improvements, or open issues if your run into problems along the way.

The rest of this post will be a deep dive into earlier iterations of this project, and an closer look at the design details and challenges of the final design. It’s easier to understand why a second iteration was needed after reviewing the shortcomings of version 1, so that’s where we’ll start.

Continue reading →

High performance GPU cooler for the NVIDIA Tesla K80

The “forthcoming” project mentioned throughout this post has been released! Check it out here.

Here’s a (long winded) video overview of this project:

Background

Rendered desperate for VRAM by a forthcoming stylegan-related project, I recently had to wade thermistor first into the concernedly hot and strange world of GPUs without video outputs to design a high performance cooler for the NVIDIA Tesla K80.

Too esoteric to game on, and too power hungry to mine cryptocurrencies with, the K80 (allegedly the ‘The World’s Most Popular GPU’) can be had for under $250 USD on ebay, a far cry from it’s imperial MSRP of $5000. By my math, the card is one of the most cost-efficient ways to avail one’s self of video ram by the dozen of gigabytes.

This sounds great on paper, but actually getting one of these configured to do useful work is a kind of a project in, and of itself. I’ll eventually get to this in the aforementioned upcoming post. Today’s topic however, is upstream of all that: the task of keeping these things cool.

Continue reading →

3D Printed Pen + Notebook Organizer

There have been a few posts on this blog about the functional benefits of using printed parts to join existing objects in a reliable and precise way. Most of the time my printed parts themselves look strange. The goals are usually printability and a clean assembly of printed and non-printed. As an attempt to buck this trend,  I recently designed and manufactured a desktop organizer that showcases the medium’s ability to bond objects and also look great.

Continue reading →

A 3D printed solution for storing a Valve Index on a wire shelf

Looking for a wall mounted version of the HMD mount? Check out this remix on thingiverse (thanks Sean)!

Here’s a video going over the design:

The printed parts can all be found on thingiverse here. Please let me know if you use any of these! I’d love to talk about potential improvements that could be made.

Continue reading →

Hey! This post was written a long time ago, but I'm leaving it up on the off-chance it may help someone. Proceed with caution. It may not be a good idea to blindly integrate this code or work into your project, but instead use it as a starting point.

100% 3D Printed Desktop Microphone Stand

Here’s a video:

Here are some images:

This is a quick design I came up with rather than spend the $20 on amazon. You can get the STL files on thingiverse here.

Hey! This post was written a long time ago, but I'm leaving it up on the off-chance it may help someone. Proceed with caution. It may not be a good idea to blindly integrate this code or work into your project, but instead use it as a starting point.

Wall-Mounted Drybox for 3D Printing with Nylon

It’s well known that nylon based 3D printer filaments need to be dried out before they’re used. What happens though when you have a 30+ hour print? The spool can take on a lot of moisture in that amount of time and compromise the print.

Many people have solved this problem by making filament dryboxes, somewhat airtight containers that contain a desiccant to dry out the air inside of the chamber.

I have to print several large parts from nylon for client, and I was having trouble in the last hours of the print due to the spool taking on water from the air. I decided to build one of these chambers but with a twist:


Mine is wall mounted! Space in my lab is a premium and the walls are free real estate.

The parts for this build is are available on my Thingiverse page. Oh and if you’re curious, I’m using a wall-outlet-rechargeable desiccant pack from Amazon which I got for $15.

The bolts are M3x10mm, and the nuts are M3 nuts, both from McMaster Carr.

Thanks for reading!

Hey! This post was written a long time ago, but I'm leaving it up on the off-chance it may help someone. Proceed with caution. It may not be a good idea to blindly integrate this code or work into your project, but instead use it as a starting point.

#goodprints – Episode #1

Here’s a video:

For a while I’ve been logging my favorite prints here but some of them are two small to warrant a post. So introducing: #goodprints! At first I’m going to shoot for monthly installments, but as I print more, I’ll post more.

This time we’ve got 3 prints in the above video. Here are the details:

Raspberry Pi Wire Shelf Mount – Everyone knows that wire shelves are the best. Now you can securely mount a Raspberry Pi to one. Thingiverse Link

Here is the drawing for mating with the shelf:

Wallet, Keys & Leatherman Wall Mount – I’m constantly loosing these things in my lab, now they’re not going anywhere. Thingiverse Link


Wall Hook – This is for mounting stuff like filament spools, wire, and tape to the wall. It accepts 3/4 inch dowels. There are two version, one 85mm long and one 150mm long (designed to fit hatchbox 1kg filament spools). Thingiverse Link

Hey! This post was written a long time ago, but I'm leaving it up on the off-chance it may help someone. Proceed with caution. It may not be a good idea to blindly integrate this code or work into your project, but instead use it as a starting point.

#codehell 2 – THERMAL RUNAWAY Errors on Prusa i3 MK2 3D Printer

This time we’re trying to work through a hardware bug!

Without warning, my printer would stop it’s current print and display “THERMAL RUNAWAY” on the display screen:

This would happen once every couple of prints or so.

According Prusa’s Docs a common cause of this is problems with the thermistor connection. They show a graph that has very erratic readings from the sensor:

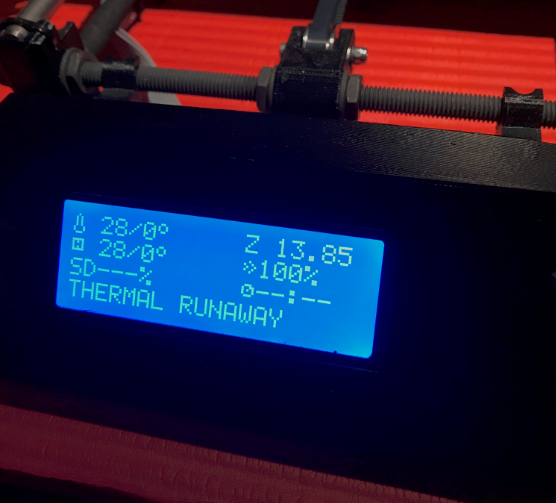
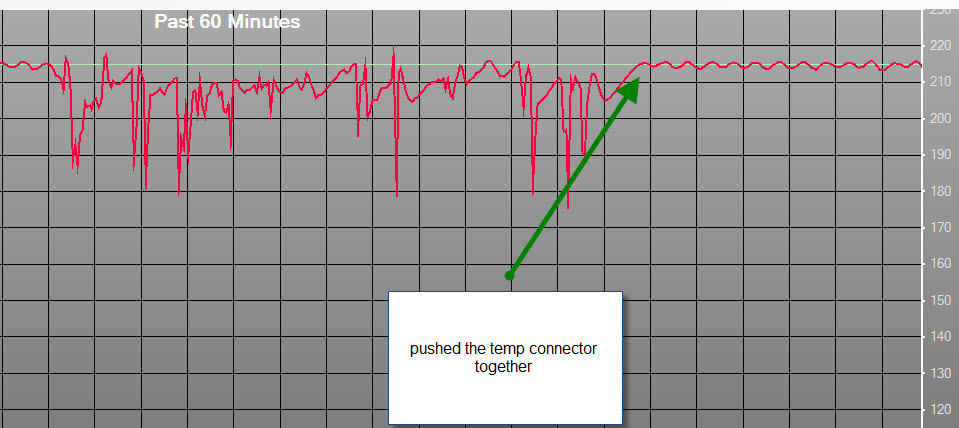
 This seemed like a good place to start so I re-seated the connector and used octoprint to generate my own graph:

No erratic readings, the temp would drop off and then start heating back up.

The problem ended up being the connection between the terminal lug and the wire on the heater in the hotend. To fix this, I cut off the crimp lug and stripped away some insulation. I put this into the screw terminal block. I’ve done a couple of prints and had no issues after making this modification.

Hey! This post was written a long time ago, but I'm leaving it up on the off-chance it may help someone. Proceed with caution. It may not be a good idea to blindly integrate this code or work into your project, but instead use it as a starting point.

Singer Parts Drawer Holder

I use these Akro-Mils 10144 D sets of drawers to keep my various electronics components organized. They’re cheap, reasonable quality, but most importantly inexpensive.


drawer

Something that I find myself doing a lot is transferring individual drawers around. For example, I have a specific drawer that holds short jumper wires for breadboards. Sometimes I bring this drawer up to campus for working in the lab. Same goes for my misc-resistor drawer. It’s much easier to move the drawer rather than re-packing it.

The problem is that these are open drawers! They don’t have lids, so what I’ll do is put it in a ziplog bag and throw it into my backpack. This is a bad solution, I have a 3D printer, time to get CADing.

I wanted the drawer to be able to lock in place, so it wouldn’t slide out of the holder while in transit, here is a video of the locking mechanism in action:

As I iterated on this design, it became clear that I could get away with a pretty thin wall thickness, and that extending the slot cut made it much much easier to flex the locking mechanism, so the grab point on the outer surface became unnecessary.

Annoyingly, I couldn’t figure out a good solution to be able to use this part without having to use supports.

Here is the Thingiverse Link

If you’re interested, I’m keeping a page of all of my prints. You can find it here.

Hey! This post was written a long time ago, but I'm leaving it up on the off-chance it may help someone. Proceed with caution. It may not be a good idea to blindly integrate this code or work into your project, but instead use it as a starting point.