Hello!
So for my own benefit, here’s the steps you need to take to get analog inputs working with a Raspberry Pi.
I’m grabbing most of this from: http://scruss.com/blog/2013/02/02/simple-adc-with-the-raspberry-pi/
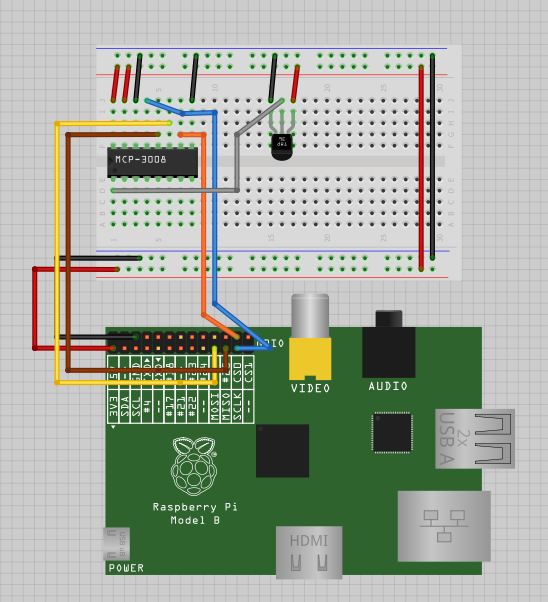
The first thing you’ll need is an MCP3008. Using jumper wires, hook it up to your pi using this diagram.
Power your RPi up and run the following commands to get it all set up.
First thing’s first, you’ll need to enable SPI in the kernel so:
|
1 |
sudo vi /etc/modprobe.d/raspi-blacklist.conf |
Comment out the spi-bcm2708 line so it looks like this:
|
1 |
#blacklist spi-bcm2708 |
Then run this to make it more permanent.
|
1 |
sudo modprobe spi-bcm2708 |
Now for the real meat of it. You’ll need these packages for SPI and the WiringPi library makes things a whole lot easier for us.
|
1 2 3 |
sudo apt-get install python-imaging python-imaging-tk python-pip python-dev git sudo pip install spidev sudo pip install wiringpi |
Now everything should be good to go, now for the python.
You can debug this any way you like, but my favorite way to do it is using the program geany. I like to start up a VNC server with root so I don’t get into any trouble with the GPIO permissions.
But here’s the program.
|
1 2 3 4 5 6 7 8 9 10 11 12 13 14 15 16 17 18 19 20 21 22 23 |
#!/usr/bin/python # -*- coding: utf-8 -*- import spidev import time spi = spidev.SpiDev() spi.open(0, 0) count = 0 def readadc(adcnum): # read SPI data from MCP3008 chip, 8 possible adc's (0 thru 7) if adcnum > 7 or adcnum < 0: return -1 r = spi.xfer2([1, 8 + adcnum << 4, 0]) adcout = ((r[1] & 3) << 8) + r[2] return adcout while True: tmp1 = int(round(readadc(0)/10.24)) print "in1:",tmp1 count = count +1 time.sleep(0.2) |
And that’s pretty much it, the result should look something like this:
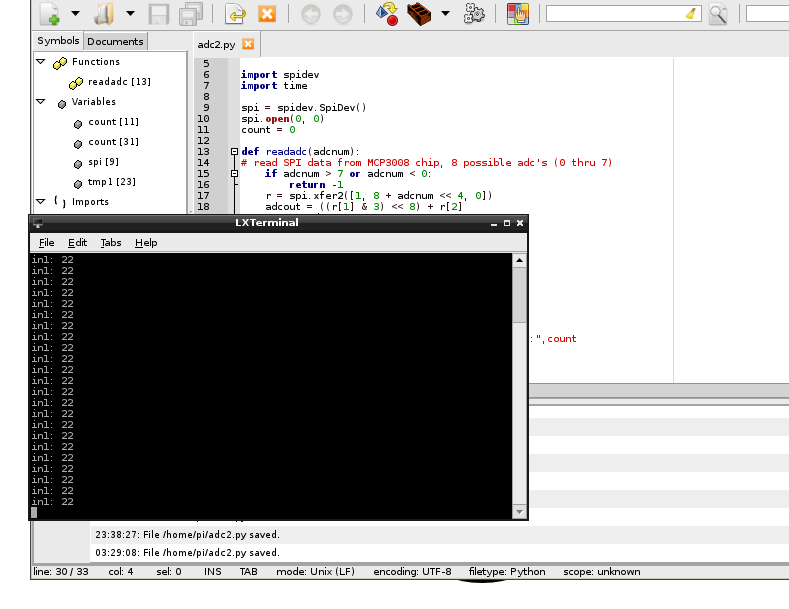
There you go!
I followed your blog and tried. I think python-imaging, python-imaging-tk, and git is not necessary.