I figured that doing this would be nontrivial but turns out it took a little work:
I’m trying to emulate an official 7″ Raspberry Pi Touch Display in a VM, so for this post the target resolution is 800 x 480. If you want to change it to another resolution swap in yours for the rest of this guide.
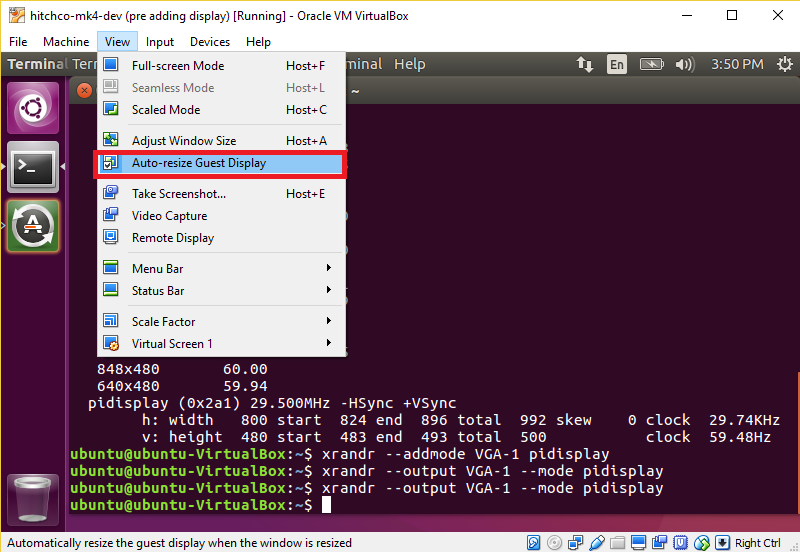
First, make sure Auto-resize Guest Display is deselected in Virtualbox:
Run the following command in your terminal:
|
1 |
cvt 800 480 60 |
The output should look something the the following, starting with Modeline…![]()
Copy the text after Modeline so in this case it would be
|
1 |
"800x480_60.00" 29.50 800 824 896 992 480 483 493 500 -hsync +vsync |
And paste it after the following command:
|
1 |
xrandr --newmode |
NOTE! You may want to change the 800x480_60.00 to something without an underscore in it, it was causing problems on my system. I changed it to pidisplay. The resulting command for this example is:
|
1 |
xrandr --newmode "pidisplay" 29.50 800 824 896 992 480 483 493 500 -hsync +vsync |
You should be able to run the above command without error. Next, run:
|
1 |
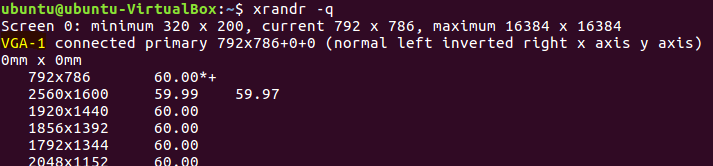
xrandr -q |
You’ll be greeted with output similar to this. Note the name of the display device, in this case VGA-1.
 With that output name, enter the following two commands:
|
1 2 |
xrandr --addmode VGA-1 pidisplay xrandr --output VGA-1 --mode pidisplay |
After running that second command, the window should jump to it’s new resolution! You’re done!