Turns out it’s not that hard at all! Here’s a video of the whole thing working:
This basically works around concepts I first explained here. It’s still really cool though! SPI is really fast and really easy to use, perfect for a novice like me.
Here are the physical representations and schematics of the setup seen on my desk:
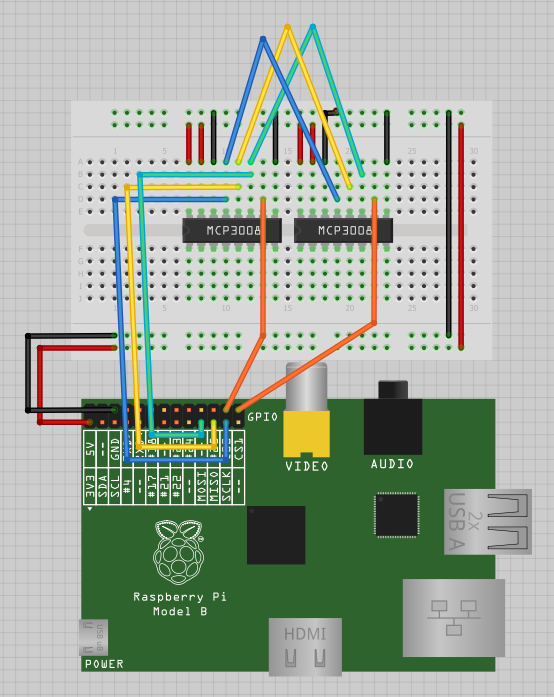
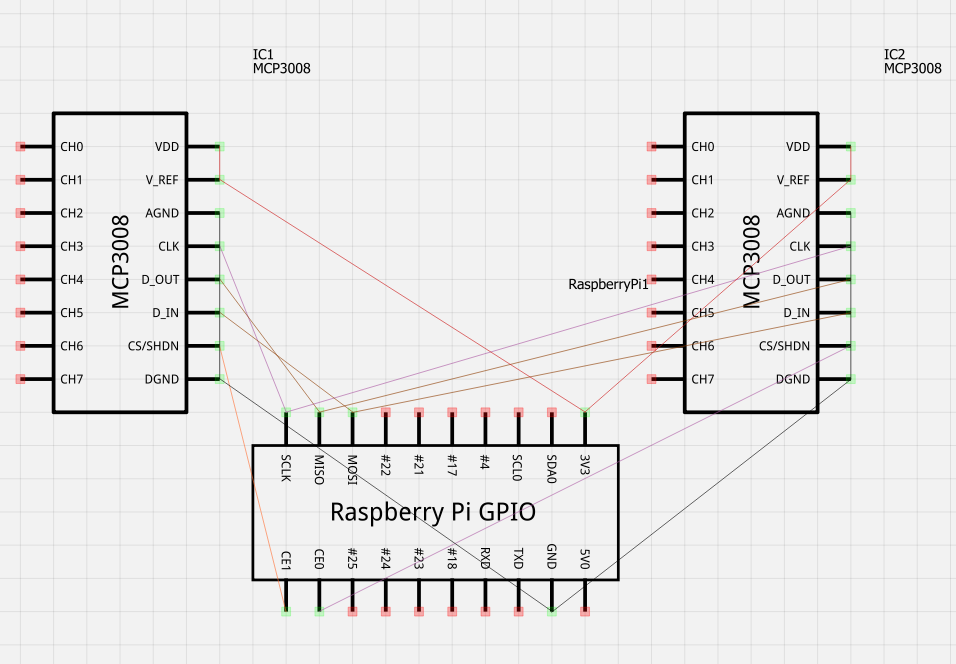
Images generated by fritzing.
Here’s the code that makes it all work!
|
1 2 3 4 5 6 7 8 9 10 11 12 13 14 15 16 17 18 19 20 21 22 23 24 25 26 27 28 29 30 |
#first ADC setup on SPI port 0 import spidev spi_0 = spidev.SpiDev() spi_0.open(0, 0) #this fucntion can be used to find out the ADC value on ADC 0 def readadc_0(adcnum_0): if adcnum_0 > 7 or adcnum_0 < 0: return -1 r_0 = spi_0.xfer2([1, 8 + adcnum_0 << 4, 0]) adcout_0 = ((r_0[1] & 3) << 8) + r_0[2] return adcout_0 #first ADC setup on SPI port 1 import spidev spi_1 = spidev.SpiDev() spi_1.open(0, 1) #this fucntion can be used to find out the ADC value on ADC 1 def readadc_1(adcnum_1): if adcnum_1 > 7 or adcnum_1 < 0: return -1 r_1 = spi_1.xfer2([1, 8 + adcnum_1 << 4, 0]) adcout_1 = ((r_1[1] & 3) << 8) + r_1[2] return adcout_1 while 1: for x in range (0, 8): print 'Port ' + str(x) + ' | ' + 'adc_0: ' + str(readadc_0(x)).zfill(4) + ' | ' + 'adc_1: ' + str(readadc_1(x)).zfill(4) print '----------------------------------' |
Here is some further reading:
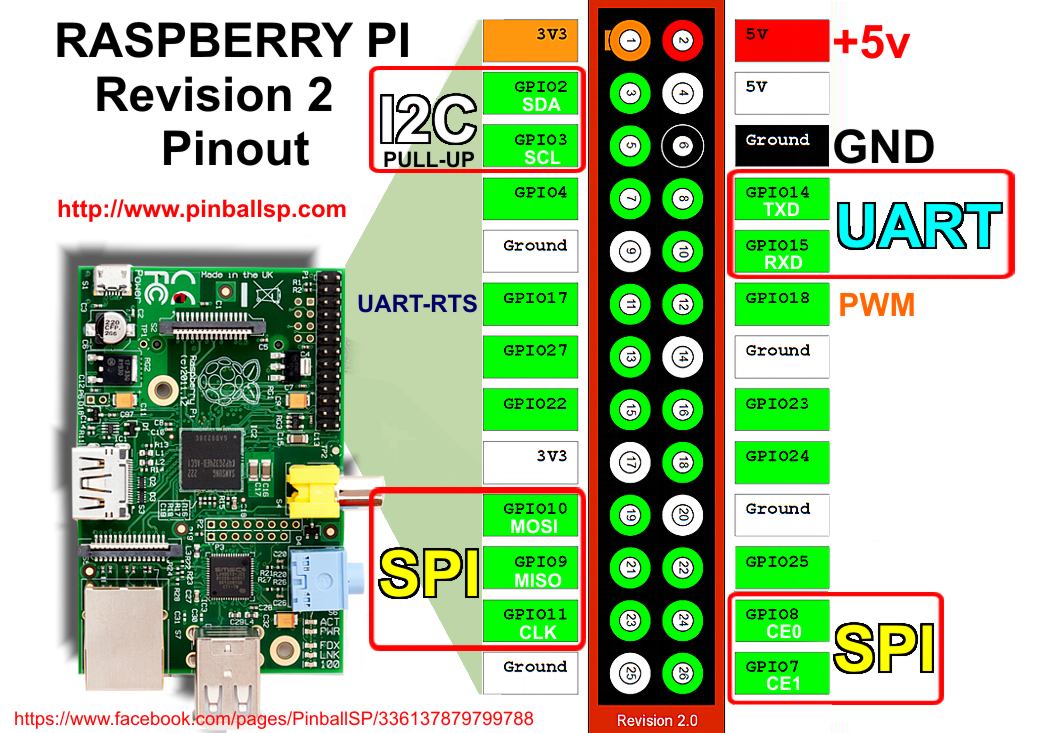
http://www.megaleecher.net/sites/default/files/images/raspberry-pi-rev2-gpio-pinout.jpg
http://hertaville.com/2013/07/24/interfacing-an-spi-adc-mcp3008-chip-to-the-raspberry-pi-using-c/
http://tightdev.net/SpiDev_Doc.pdf
Thanks for reading!
Is there a difference between spidev (3.2) and the library ‘python-periphery’, or the ‘py-libbcm2835’ library? They all seem to do spi, however not sure if they have different applications or if they are just deprecated libraries?
Interestingly, the spidev documentation says you can set the number of bits per word(transfer) , 8..16, however according to the pi documentation, the spi peripheral connected to the header only supports 8/9! So perhaps spidev is a generic driver whose functionality may or may not be fully supported by the rpi?
BTW, doesn’t a python list ([0x90,0,0,0,0]) consist of ints and not bytes? Does the driver take this into account and convert it to 8-bit bytes before sending?